 |
The first time you open Outlook Express, your old mail
settings will be imported. There are however two options that you will you will most likely want to change.
These can both be changed using the information below.
A configuration wizard will also run to import the mail settings from other email programs such as Eudora, etc. I'm not sure of how well the wizard works for the other programs. |
Setting it up from scratch
Once installed and the Internet connection has been setup,
the first time you start Outlook Express, a wizard will run and ask for
all of the information needed to send e-mail.
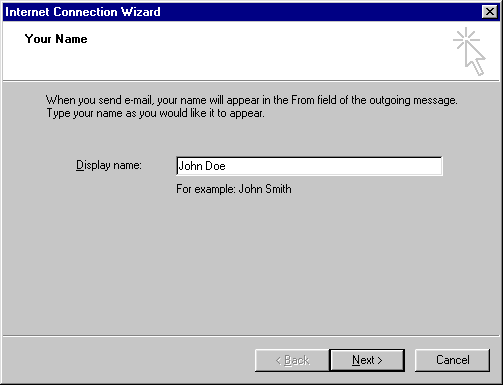
First, enter the name that you would like to use for your outgoing mail, and then click the Next button.
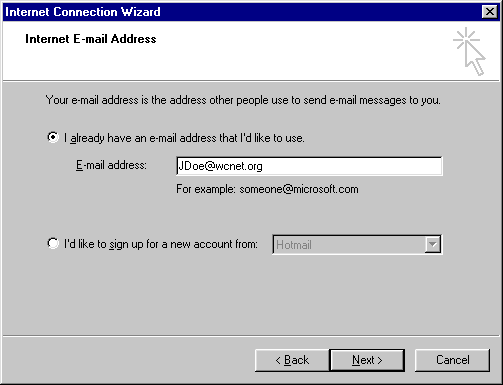
Now enter your WCNet email address, and click the Next button.
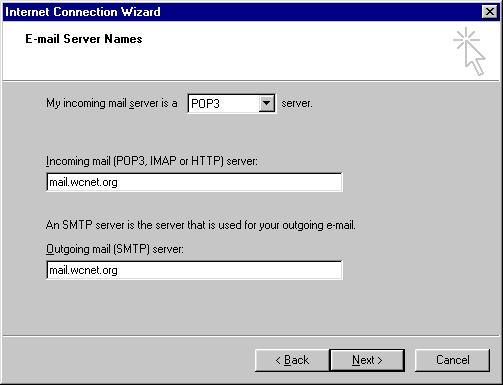
Then choose the incoming mail server: POP3 from the drop down menu, and enter mail.wcnet.org for both the Incoming and Outgoing server names.
Click the Next button.
Next, enter your WCNet Username and Password. These will be the same as the Username and Password that you use to connect to the Internet with WCNet.
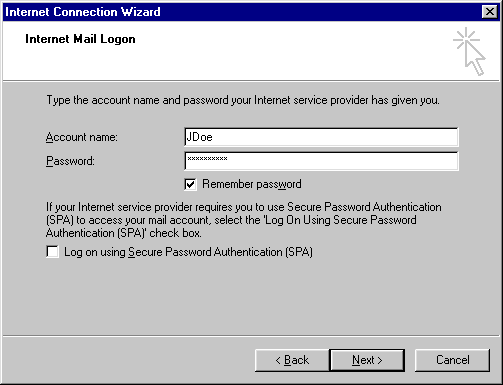
Note: If you check the box that says: "Remember Password" you will not be prompted to provide it when you connect to the mail server to retrieve your email. However, anyone else using your machine will also be able to get to your email inbox just as easily. This is not an issue for most users, but it something to be aware of.
Click the Next button again, and then Click the Finish button.
You have now sucessfully configured Outlook Express to retrieve your email from WCNet!
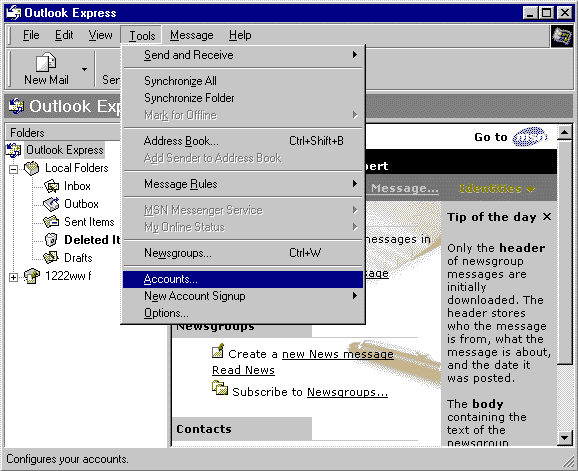
If necessary, all of your email profile information can be entered manually. Account information can be changed, or new Accounts can be created in the Accounts section found under the Tools menu. Note that many of Outlook Express' features can be found by selecting "Options" at the bottom of the Tools menu.
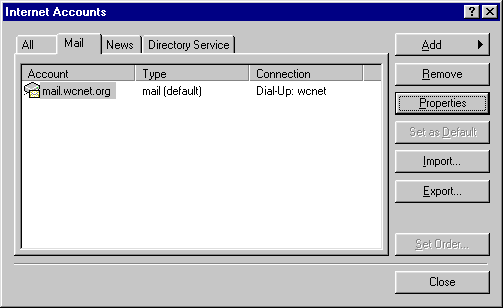
Next, click the Mail tab at the top. If only one account
has been created, it will be highlighted. Now click the Properties button.
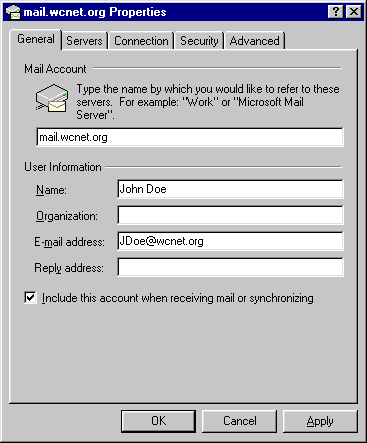
With the General tab selected, enter your email account name: mail.wcnet.org and your name and email address.
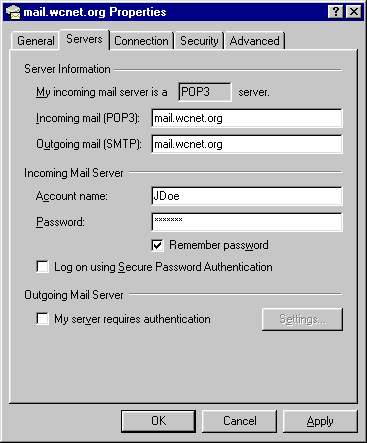
Next, click on the Servers tab at the top.
This screenshot shows a typical WCNet setup.
NOTE: Due to recent changes in the WCNet mail program, you should use mail.wcnet.org as the POP3 and SMTP servers instead of wcnet.org
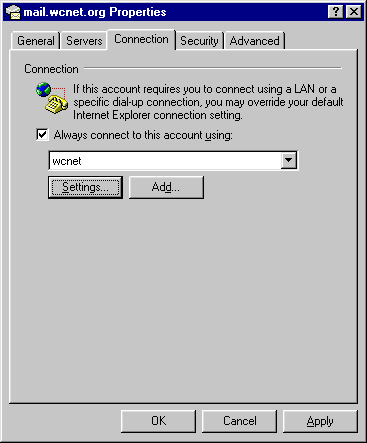
Now, click the Connection tab at the top and check the "Always connect to this account using: " checkbox. Then select the proper connection from the drop down menu. To do this click the down arrow and click on the name of the connection used to access WCNet.
Finally, click OK, or Apply to finish setup.
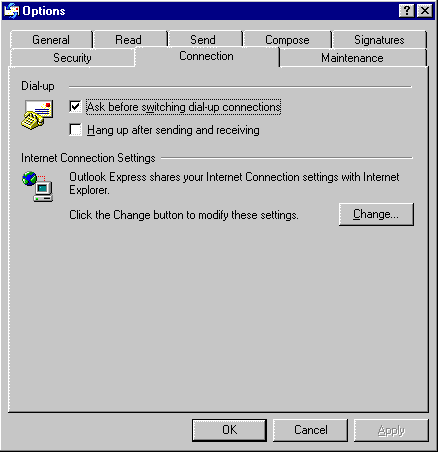
Note to Outlook Express 5.0 users:
OE 5.0 appears to default to hangup after receiving and sending mail.
Remove the checkmark to cancel this option.
|
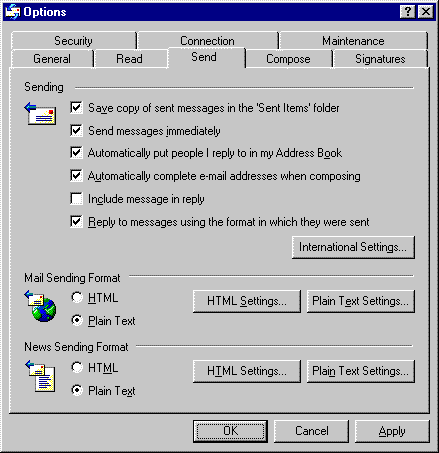
To change your outgoing email to HTML or Plain Text format, click the Send tab at the top of the Options dialog box. At WCNet, we still recommend sending plain text messages unless you know the person receiving the message has an email client with HTML capabilities.
Below, a typical WCNet setup is shown.
Note: Under the General tab, "check for mail every...
minutes"
should not be used, unless specifically asked for
by the user.
|
This page shows only the most important settings,
and there are certainly other Options that could affect performance.
|
|
 |

